.png)
Verifying your account is an essential step to unlock the full features of your Deriv account Deriv account—including trading forex, cryptocurrencies, and more trading forex, cryptocurrencies. Our quick, secure process is designed to help protect your funds, ensure your account is compliant with regulations, and get you ready to trade with confidence.
Quick Summary
- Confirm your personal details before starting KYC
- Upload a clear selfie for a liveness check
- Submit a valid government-issued ID document
- Provide proof of your home address
- Verification typically takes just a few minutes
Why is account verification required?
Account verification is not only a regulatory requirement for financial platforms like Deriv, but also a critical security step to protect your account. Verifying your identity helps Deriv secure your account, reduces the risk of fraud, and complies with regional and international KYC (Know Your Customer) and anti-money laundering (AML) laws. This maintains the integrity of Deriv’s trading ecosystem and helps add an extra layer of security to every trader’s account to foster a transparent and trustworthy environment.
Deriv verification process: Step-by-step instructions
1. Confirm Your Personal Details
Before beginning the identity verification process, double-check that your full name, date of birth, and citizenship on Deriv match exactly with your government-issued ID.
Tip: If there’s even a small discrepancy—such as a missing middle name or an incorrect date—update your Deriv profile before you begin. Mismatched details are the most common cause for verification delays.

2.Select your country of residence
Choose your country of residence to determine how your personal data will be processed:
- All countries except USA
- United States of America
You can tap Learn why we need this information for more details.

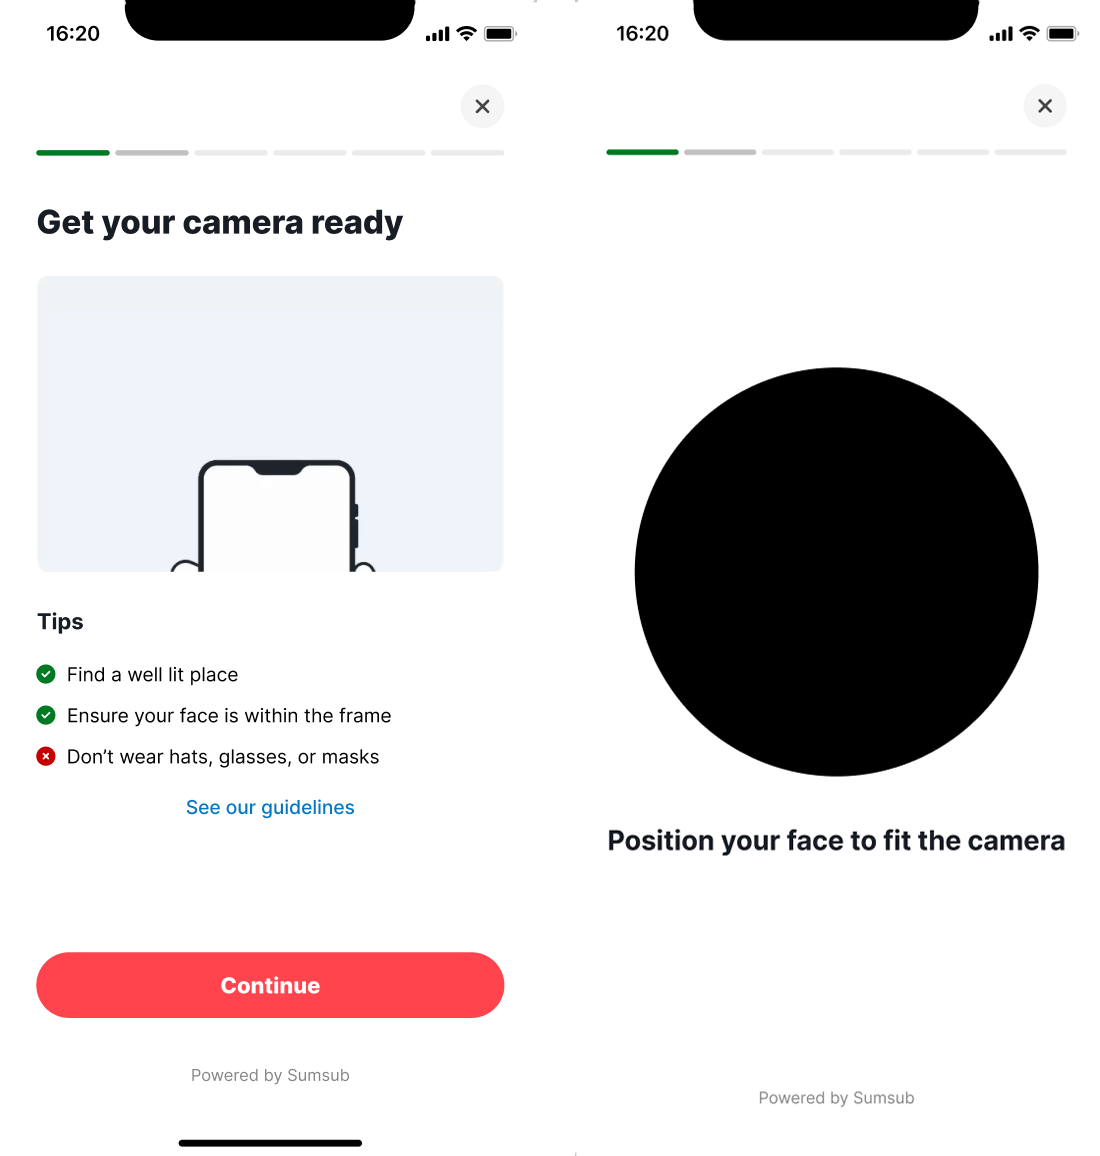
3. Upload Your Selfie (Liveness Check)
You’ll be prompted to take a selfie using your device's camera. This step helps confirm you’re the genuine account holder.
To ensure a successful liveness check:
- Choose a bright, well-lit environment
- Ensure your face is clearly visible within the frame
- Remove hats, glasses, or anything that might obscure your features
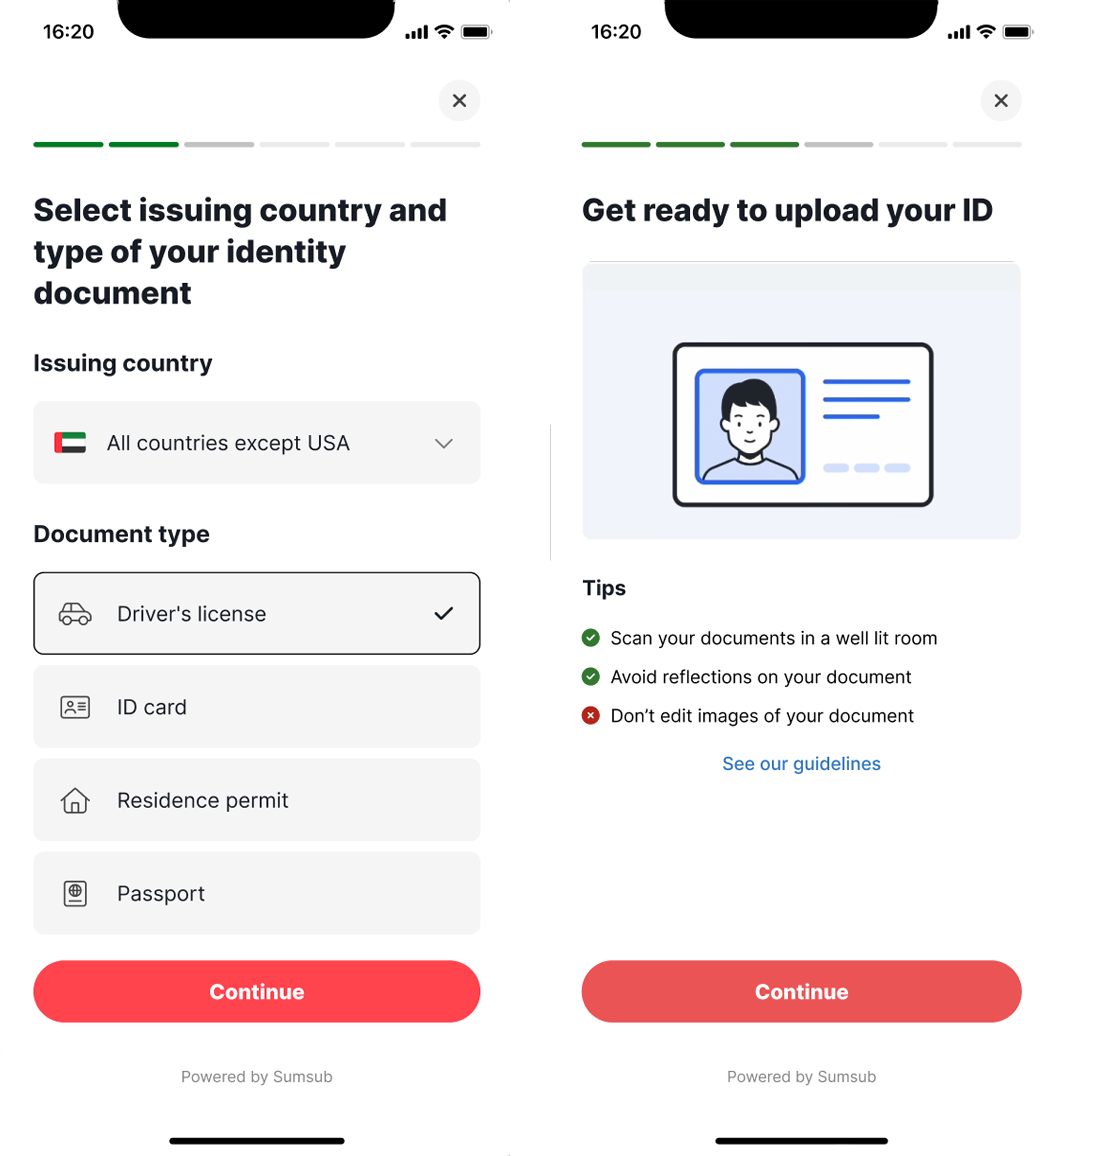
4. Prepare and Upload Your ID Document
Select your issuing country, then choose which form of identity document.
Documents accepted for account verification:
- Passport
- UAE government-issued ID (e.g., driving licence, residence visa)
- National ID of a GCC country
Document requirements:
- Use a clear, unedited photo of the original document
- Avoid glare, shadows, or obstructions
- Details must match your Deriv profile exactly
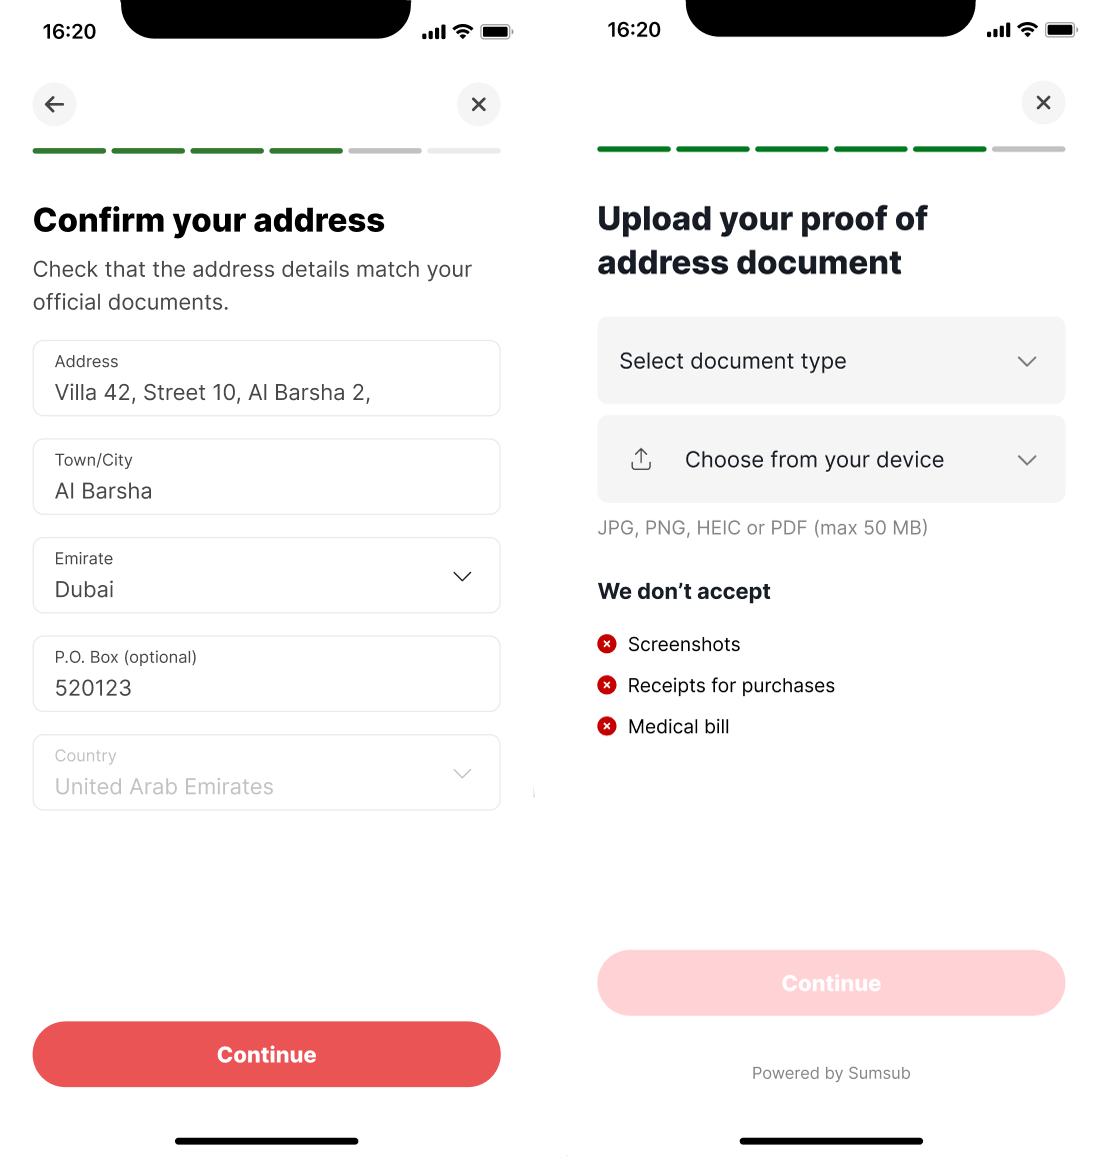
5. Verify Your Address
You’ll need to confirm your residential address—this must be the address that appears on your supporting document. Once you have confirmed your address, you will be required to upload a proof of address document to verify the address you have submitted.
Accepted proof of address documents include:
- Valid ID document showing your address
- Utility bill (electricity, water, gas)
- Recent bank statement
- Government-issued letters
Requirements:
- The document is dated within the last 3 months
- Clear and readable image or file (JPG, PNG, HEIC, WEBP, or PDF; up to 50 MB)
- No screenshots, receipts, or medical bills
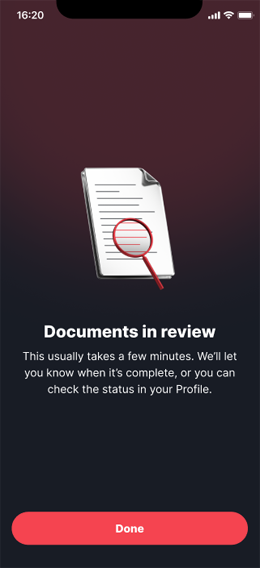
6. Final Confirmation
Once you’ve submitted your details and documents, you’ll see a “Verification in Progress” screen. Most accounts are verified within minutes. You’ll be notified by email when your account is verified, or you can check your status any time in your Profile.
How to avoid common mistakes with account verification
Many verification delays are caused by easily avoidable errors. To speed up your approval, always ensure that:
- Your submitted documents are clear, legible, and unaltered.
- Double-check that your name, address, and date of birth match exactly across your documents and Deriv profile.
- Make sure all photos are taken in a well-lit setting, without glare or shadows.
- Submit only the required document formats and ensure your proof of address is dated within the last three months.
- If there are any updates to your profile, apply them before starting the verification process—this will help your identity check go through smoothly the first time.
Quiz
Which of these documents is NOT accepted as proof of address on Deriv.ae?
FAQs


.webp)